Ingredients
-
Beans
-
1 Pound Dry Kidney Beans
-
1 Red Bell Pepper
-
1 Yellow Bell Pepper
-
1 Green Bell Pepper
-
1 Onion
-
4 Cloves Garlic
-
1 Teaspoon Dried Thyme
-
1 Tablespoon Smoked Paprika
-
2 Tablespoons Veggie Stock Base
-
Several Dashes of Hot Sauce
-
Rice
-
3 Cups White Long Grain Rice
-
3 Cups WaterYou will need double the water if cooking using the traditional method.
-
1 Tablespoon Veggie Stock Base
Directions
Pressure Cooker Method:
- Prepare Ingredients: Pick through the beans to make sure there are no stones or debris. Dice the bell peppers and onion into medium dice. Mince garlic.
- Cook Beans: Heat pressure cooker, without a lid, over medium-high heat and add a small amount of oil. Saute the bell peppers and onions for 4-5 minutes until they begin to soften. Add the garlic, smoked paprika, and thyme and saute for another 2-3 minutes. Add beans, veggie stock base and cover the beans with water until the water is about 2-3 inches above the beans. Secure the lid and bring the pressure cooker to high pressure. Reduce the heat to maintain the pressure and cook for 1 hour and 10 minutes on high pressure.
- Finish Beans: Once the time is completed, release the pressure using the quick-release method. Remove the lid and season with salt, pepper, and hot sauce to taste. If desired, at this point you can also add a small amount of chicken or vegetable bullion to add additional flavor. Pour the beans out of the pressure cooker and put them in a bowl to set aside. Clean and dry the pressure cooker for step 4.
- Cook Rice: Rinse the rice in a fine-mesh sieve for about a minute until the water runs clear. In the cleaned pressure cooker, put rice, water, and veggie stock base. Cover with the lid and bring the pressure cooker to high pressure. Reduce the heat to low and cook for 3 minutes and then remove from the heat. Allow the pressure cooker to naturally release the pressure for about 10 minutes and remove the lid and fluff the rice.
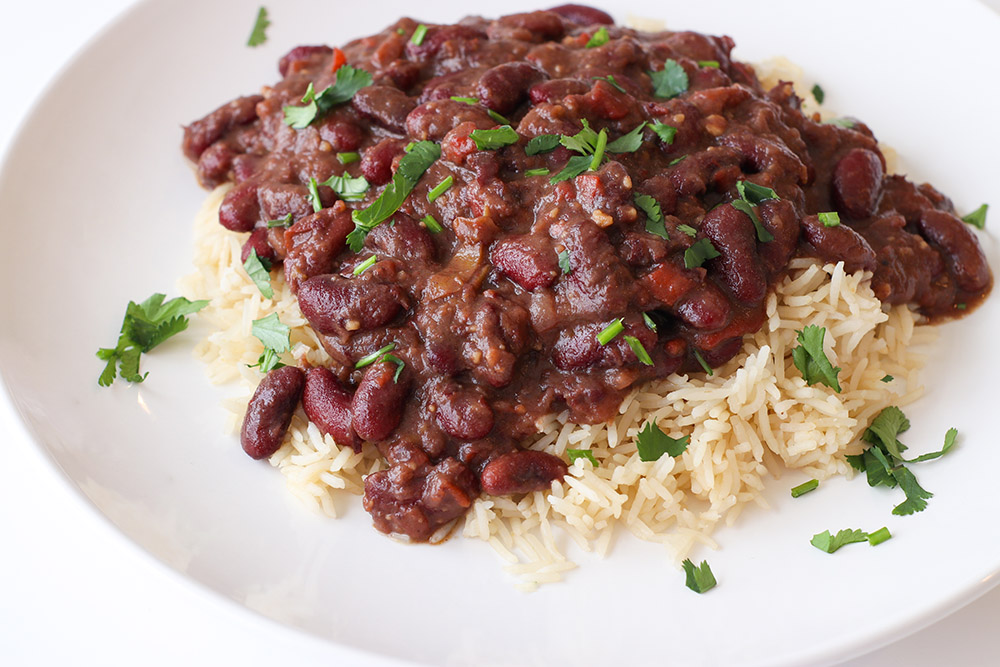
- Serve: Put a large scoop of rice on a plate or bowl and top with a large scoop of beans. Garnish with cilantro if desired.
Traditional Method:
Note for Traditional Method: For the rice, this recipe’s ingredients are portioned for a pressure cooker. If you are using the traditional method for the rice below, you will need to add double the water and veggie stock base. As an example, if you are making 4 servings of rice, instead of 3 cups of water you will need 6 cups and instead of 1 tablespoon of the veggie stock base, you will need 2 tablespoons. You do not need to alter the amount of rice.
- Prepare Ingredients: Pick through the beans to make sure there are no stones or debris. Dice the bell peppers and onion into medium dice. Mince garlic.
- Cook Beans: Heat a large pot over medium-high heat and add a small amount of oil. Saute the bell peppers and onions for 4-5 minutes until they begin to soften. Add the garlic, smoked paprika, and thyme and saute for another 2-3 minutes. Add beans, veggie stock base and cover the beans with water until the water is about 3 inches above the beans. Cover the pot with a lid and reduce to a simmer. Cook for 2-3 hours until the beans are soft and the liquid has thickened. Check regularly to ensure there is enough water.
- Cook rice: In a fine-mesh sieve, rinse the rice until the water runs clear. In a medium-sized saucepan combine the rice and double the water and veggie stock base (see the note above). Bring to a simmer and cook for 15-20 minutes until the rice is tender and all the liquid has been absorbed. Remove from the heat and fluff with a fork.
- Finish the Beans: Once the beans are soft, season with salt, pepper, and hot sauce to taste. If desired, at this point you can also add additional vegetable bullion to add more flavor.
- Serve: Put a large scoop of rice on a plate or bowl and top with a large scoop of beans. Garnish with cilantro if desired.
Meal Prep Tip:
Store the beans and rice in separate containers. This meal keeps for 4-5 days in the refrigerator or can be frozen for up to 6 months.
* I get commissions for purchases made through links in this post.


